Easy plate facelift - Do It Yourself - Plate Monograms

Need a good and EASY gift idea, or have some pretty plates laying around the house?  This project was a lot of fun.

Plate Monograms!


First off, go to your favorite discount store or thrift store and get yourself some plates that inspire you.  I bought this set from a thrift store at .25 cents for the small plates and .50 cents for the large plate. 

Next choose a fun font off your computer and print your (or someone elses) last initial. If you have the Cricut or Silhouette I am sure you could do some fancy sticker sheet for this! (wish I had one). I used the font Blackadder ITC.


Next I used an exacto knife and cut out the "H".  I sprayed 3D mounting spray (sticky stuff) to the backside of the paper.  I cut it out and stuck it on the plate.  (really you don't need to cut it out - just press it on the plate so that it lays flat where you would spray paint.)


Now you can either spray paint this or use another paint that you could just dab on like you would with a stencil.  The reason I say that is because using the spray paint didn't work as well as I had hoped.  It leaked through the edges of the paper and left a very fuzzy H.  Fortunately it is easy to clean up the lines.  Just dip a Q-tip in mineral spirits (available in any home improvement store) and clean up the edges.  You will need to do it right away because if the paint cures it is a lot harder to get off.


But with a little "elbow grease" it should turn out like this! 


I glued the smaller plate with the monogram onto the larger plate.  (use a heavy duty glue) Then I attached these great inventions called Dischangers


You just wet the back of them till they are sticky and attach to the plate.  Let it dry for 24 hours and you have a super easy hook!   If you ever needed to remove them you just soak them in water.  The size you see above cost $2.25.  I had the larger plate holder so all I needed was to buy 2 small ones.

UPDATE: I realized there is a way to make your own FREE PLATE HOLDER!!!  Just click over to that post - I was so excited when I figured it out.

The entire project cost me $5.50!!! Wouldn't it make a great personalized gift!!! 


Other ideas I had would be to spray chock paint on the center circle and write anything you would like on it.  How about a "Happy Birthday" message on your child's birthday?  Or a pumpkin or Christmas tree on it for the holidays.  Of course you could just use chock to write your initial!  There are many ideas that would make a great gift.  For the very ambitious who feel comfortable with power tools (that would not be me - see this post) they could easily make a clock out of the plate too.


Enjoy - I hope your "Creative Juices" have been stirred! 

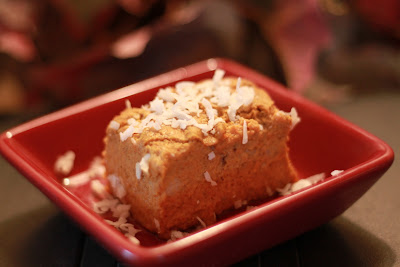
Crockpot Pumpkin Pie Custard - Sugar, Gluten, Dairy Free

I guess when I make a dessert three times in one week it becomes "Blog Worthy". The fact that it is sugar free, gluten free, dairy free, and uses the crock pot automatically puts it on the top of my "LIKE" list. 

I got this recipe off a wonderful, well known blog Simply Sugar and Gluten Free.  I love Amy, she is so genuine and has such a gift with making healthy food taste fabulous! 


Pumpkin Pie Custard

1 3/4 cups pumpkin puree
12 ounces (1 1/2 c) coconut milk (or evaporated milk)
2 Tbsp  agave nectar
2 large eggs, beaten
2 tablespoons melted coconut oil (or butter)
2 teaspoons vanilla extract
1/4 teaspoon liquid stevia (adjust for your own taste)
1/2 cup coconut flour blend  (or regular flour if not going GF)
2 teaspoon cinnamon
1/2 teaspoon nutmeg
1/2 teaspoon allspice
dash of salt


Prepare the crock of a 4 -6 quart CrockPot with cooking spray.
Whisk together pumpkin puree, milk, agave, eggs, melted oil or butter, vanilla, and liquid stevia. In a separate bowl, combine flour, cinnamon, nutmeg, and allspice. Add dry ingredients to wet ingredients and combine until just mixed.
Add pudding mixture to a greased crock. Cover and cook on low for 6 - 8 hours, or until the internal temperature reaches 165F.
If you use a larger crockpot just double the recipe. 

*NOTE* I highly recommend cooking this the day before serving.  I found that the flavors evolve much more the next day.  If you have the space just stick the entire crock pot in the refrigerator.  It makes the cuts a lot cleaner after it cools. 

This recipe REALLY is best served with whip cream.  If you don't have any sprinkle slivered almonds or coconut flakes on top.

ENJOY! Happy Thanksgiving! 


Treasure Tuesday - The UGLY box reveal.

Remember my post about spray paint and how I told you I had a plan for a very sad and homely looking box? 

Well I was very inspired by a wonderful blogger with this post below so I can't take credit for this project myself.    


Sticks and Stones Home Decor has made old breadboxes look good again!  Here is what she did:

 
I got this idea from a crafty friend and I have made several of them. The bread boxes are easy to find at thrift stores and the DI.  They usually run between $3.00 and $5.00. 

How to:

1.  I bring them home and wash the cobwebs out of them. 
2.   Prime them and paint them.  I use spray paint. Walmart  has primer and paint for a dollar a can. Yahooy!
3. Sometimes I distress them with a little sandpaper around the edges. 
4.  I sometimes stain or glaze over them.  (I just use what ever I have on hand.  Just brush it on wipe it off) The bread boxes usually have dings and scratches in them.  When you distress them it looks like those dings were on purpose. 
5.  Add vinyl lettering. 

They are super easy and super cheap.

before

The uglier they are the cheaper they are.

Here are some other uses we have come up with for these bread boxes.

1.  Drill a hole in the back to thread your cell phone charger through.  Put c-hooks inside for keys, set on a shelf near  the door you use the most. (I love to have a hidden place for clutter.) Instead of putting the word "bread" on it you could put "stuff" or "simplify".
2.  My daughter came up with this one.  Some of the bread boxes have a magnetic closure.  Her idea was to hang it upside down underneath your kitchen cabinet next to the phone.  Put pens, note pad etc. for a little message center.  Brilliant!
3.  If your bread box is big enough you could hide your can opener or toaster inside.  Again, just drill a hole in the back to thread the cord through.
4.  Giant recipe box
5.  Bill/mail organizer
6.  Desk organizer

So here is my loverly box.

And sadly, I'm horrible with power tools and almost killed myself. So this is what my box ended up like.


I tried to drill holes in the back so I could use this as a phone charger hider. (Good idea - right!) Ya, didn't work so well.  I am sure I used the wrong type of drill bit.  Next time I'll be sure and ask my husband for help.  :-)  Just follow the advice from Sticks and Stones Home Decor and I'm sure YOUR bread box makeover will be a success. Now I can just sit and read a book, I didn't want to work on a breadbox project anyway. LOL!

Treasure Tuesday - The Power of Spray Paint!

I have recently realized that EVERYTHING has potential.  A bright green vase for instance, a shiny gold plate holder, a peach lamp or maybe even an odd box.  It's this blogging that did me in.  I just can't pass up an opportunity to turn something ugly into beauty!

I'll show you how I easily got from this:


To that!


It's called the Power of Spray Paint........


One of my favorite colors is at Lowes called Oil Rubbed Bronze by Rustolum.  I just sprayed it on.  Simple as that.  I bought the "grass" from Walmart for 3.00.  Total cost for project was $5.00

Heavy green vase: $2.00
Grass: $3.00
Spray paint: had on hand

How about this tacky gold plate holder. 
Not bad covered in the Oil Rubbed Bronze.......

Total cost plate holder:  .50 cents
Spray paint had on hand

What about lamps!  The thrift stores are FULL of gorgeous lamps....that is if you can picture espresso brown instead of pale peach!
OK I haven't painted these yet but they were only $4.00 a piece and with a simple quick coat of spray paint these will look AMAZING!

Here was a $4.00 lamp that hardly needed anything.  Just a simple updated coat of aged copper on the base.
I spray painted the bottom and bought a lamp shade for $1.00.  Perfect in our master bedroom.

Total cost:  $5.00

I have put my foot down on buying any more lamps though. I mean unless my friends would like them as gifts I have no where else to put them!!!

Check out what A Few Good Pieces did with cheap OAK (blahh) thrift store mirrors! 

To THIS!

Ain't this a beauty!  Don't worry....I have an entire plan for this box.  Can you see it painted?  What about with the lid being in chalkboard paint with whatever is inside written on it.  Maybe it will be a box to put all our chargers in?  Hide those ugly cords!  Stay tuned and come back later to see the "big" reveal. 


Have you had any amazing spray paint turn around?  Please link to your blog with some ideas.
 
Related Posts Plugin for WordPress, Blogger...