Only the CRAZY! Wayfair entry light re-do

I have to admit, I am a little crazy and regarding this post I am SO GLAD my husband doesn’t read my blog!!


I fell completely in love with these Wayfair front entry lights at $149 each (that’s a LOT for me!!!) but they weren’t the exact color I wished they were.  I looked for others and I just didn’t see anything I wanted!  (the fact that they had to be Energy Star rated made it even harder) 

(Mine aren’t that large – they’re slightly smaller)
entry lights


I decided that I would spray paint them to change them to the color I needed.  (it sounds so simple doesn’t it!)  Well it was simple.  A few light swipes of the paint (really, I didn’t have to change it THAT much) and it was PERFECT! 

house 001

house 002

Are you sure you guys want to keep following me??  LOL! No really, I have seen other lights that one (less popular?) finish would be  30-50% off.  If you decided to be crazy like me, you could just paint them the shade you wanted and save yourself a pretty penny!!

I can't wait to show you them on the rock entry when the house is done, only 2 months left (except that I just found out they have to wait till Spring (too cold now) to paint the house AND do the driveway.....it's OK, so not 100% done for 4 months :-)

Till Next Time!! ~ Creative Juices Decor~

Healthy Holiday Eggnog

Nothing says the holidays better than EGGNOG for me!  I LOVE the taste but I don't really enjoy reading the back of all the eggnog containers seeing all kinds of sugars (high fructose corn syrup etc) and words I can't pronounce.  Why is it so hard to produce a healthy store bought eggnog??  It's all OK though because I found a great solution!!!

eggnog blog


I asked my friend Amy from Simply Sugar and Gluten Free to “show me how it’s done”!  She created the BEST eggnog recipe for me without the sugar or preservatives.  You won’t believe it, homemade eggnog is SIMPLE to make and my kids LOVE it! 

eggnog-collage

Healthy (or at least healthier!) Eggnog

4 large egg yolks
1 tablespoon agave nectar
3 1/2 cups low-fat milk
1/2 teaspoon cinnamon
1/4 teaspoon freshly grated nutmeg
1/4 teaspoon liquid stevia plus 15 – 20 drops to taste
3 whole cloves
1/2 cup half & half

Whisk together egg yolks and agave in a heavy bottom medium sized sauce pan.  Slowly whisk in milk, then add in cinnamon, nutmeg, stevia, and cloves.  Heat over medium low for 10 – 15 minutes, whisking constantly, until mixture thickens and will coat the back of a spoon.  If using an instant read thermometer, it should reach 165°F.  Remove from heat, transfer to a bowl or pitcher and whisk in heavy cream.  Refrigerate for 4 hours or, preferably, overnight.  Remove cloves before serving and sprinkle with cinnamon if desired. 

Will keep for 5 – 6 days in a sealed container in the refrigerator.
 
Only makes 4 1/2 cups so if you are having a party double the recipe!  Or you can add more milk for an eggnog that isn’t super thick.  It is seriously delicious! 

 
eggnog 2

Don't forget to try out iherb for your health food purchases - they have great prices.  Enter code ESE794 for 5.00 off!

ENJOY!!!  Creative Juices Décor!

Getting in the Christmas Spirit–Bird Trees and Table Decor

This is our first year in our  New Home and it's been so fun to decorate for Christmas.  You can see photos of my Christmas decor too but this is my very good friends house and she let me take tons of photos to put up on the blog :-)


Get ready to be inspired by a Christmas tree filled with birds!

christmas red cardinal bird decor


christmas bird decor


christmas tree decoration w birds

Is that STUNNING or what!!!!  And she always puts on an amazing prime rib meal – here is her table all decked out with my daughter anxiously awaiting the prime rib dinner!

gorgeous red christmas table scape

red and gold table setting christmas


Would you believe it if I told you 10 children are invited to this lavish party!


I know, I have one amazing friend!!  (we only broke 2 goblets and 3 ornaments) 


No, the children are angels.......

clip_image002


OK, maybe not angels but we do provide live Christmas music for them in return  Smile

christmas carols for family traditions
(Me and my kids playing some Christmas carols.)


If you want to see the new house we built just stop on over :-)  After 5 years of renting (without a mantel in sight!) it's been pretty fun.

christmas lights blogger
Post on Tips and Tricks to take great Christmas Light Pictures.


clip_image002[6]
Enjoy the Season! 

~ CreativeJuicesDecor~

Linking up to Thrifty Decor Chick !

Easy Children Silhouette Art

I am really excited to show you guys this next project because it was SO easy and cheap.  It's a great gift idea too!

blog3

First off, call up your local big cabinet companies and ask if they have an outlet or reject store.  I called up Huntwood cabinets and just down the street from their facility was their outlet store. (it was called BargainHunt or something like that)  You can also get a door front from Habitat for Humanity recycled store too. (although, it was nice to get a brand new door verses a used one)

changing table sylloette 009

I picked up a few door fronts for $2.00 a piece (they had TONS of cupboards and door fronts!)  I actually got that particular cabinet door for free because my daughter was with me and they guy said, “Have your daughter pick out a few for herself to do a craft on”  OK, will do!

As I was thinking what to do with her cupboard door I thought about drawing in a silhouette of my daughter in the center.  Then the light bulb went off and I thought why DRAW a silhouette when I can just take a real photo and cut it out!  (way better and can be done in a second!) 

blog 2 photos
(I took two pictures and decided once I put them on the door which one I liked best)

Those with Photoshop or an editing program this is super simple – once the photo is taken just hit the cntl and L together and you can adjust the lighting arrows where the object becomes dark.  For those that do not have Photoshop just set your child in front of a sunset or bright light and when you take the picture (without flash!) your child will be outlined like a silhouette. 

changing table sylloette 012

Next I took some pink paint with glaze and wiped it on and then wiped it off so the glaze  just went in the crevices and edges.  Next I took some pink scrapbook paper that matched another project I did in her room, cut it to the size of the middle opening and used a slightly watered down glue mixture to put it in.  I put the glue mixture of the entire top and then set in my photo.  (you can also use Mod Podge, which may be better quality – I’m just cheap)  You can spray it with a clear sealer on top once it is all dry. (spray very lightly from a distance so no large spots of sealer land on your photo)

003

I wrote on it just to personalize it.  I mean when she is 50 and it’s still hanging in her dining room she’ll want people to know it was HER at age 4 – right? Smile

blog

blog1

That’s it!  Screw in a D-ring on the back (or any hook) to hang it up! 

Total cost – UNDER $1.00! 

She wasn’t so happy about how “black” her picture came out (she said “I don’t LIKE that picture!) but now that it’s hanging in her room I think she likes it!  To my Little Princess!

Kblog

Stay tuned for what I did to turn her changing table into an entertainment unit. They match and look so cute together (you can see a little sneek peak in the close up picture above) - can't wait to show you that too!


~CreativeJuicesDecor~

Andes Mint Cookies–good cookie exchange recipe!

I got invited to a cookie exchange and my immediate thought was “Oh man, do I really want to make 6 DOZEN cookies and do I have a recipe that is good enough???”

Then I remembered a cookie exchange last year where my friend Kira brought her Andes Mint Cookies and I decided a cookie exchange might be a fun idea after all.  (-;

 blog andes mint cookies

It’s an easy cookie to make BUT, it tastes amazing and has a pretty look.  (you know these cookie exchanges can be tough, the invitation said NO chocolate chip cookies!!)

On Kira’s recipe she never mentioned how many dozen cookies it makes so I thought I’d be on the safe side and triple the recipe.  Let me tell you, I had enough to make nearly 200 cookies!!! 

My 10 year old daughter was like, “Mom, WHAT were you thinking making this much cookie dough??”  I told her we were preparing for Year 2012 and now we have a lot in the freezer to make for future cookie urges Laughing out loud

ANDES MINT COOKIES

Ingredients:
  • 3/4 cup butter
  • 1 1/2 c. brown sugar
  • 2 Tbsp water
  • 2 cups chocolate chips
  • 2 Eggs
  • 2 1/2 c flour
  • 1 1/4 tsp baking soda
  • 1/2 tsp salt
  • Andes Mints
Directions:

In a saucepan over medium heat, melt butter, brown sugar, and water together. Add chocolate chips and stir until completely melted. Cool for 10 minutes. Pour into a mixing bowl and beat in 2 eggs. Mix together flour, baking soda, and salt and combine with the chocolate mixture. Chill the dough for about 45 min. Roll into balls (approximately 1 to 1-1/2 inches in size) flatten slightly, and place on cookie sheet. Bake at 350 for 10 minutes. Cookies should be puffed but still soft.
When the cookies come out of oven, place an Andes mint on top of each cookie and allow to melt for a few minutes. Lightly swirl the melted mint on the cookie to make cream and brown icing and then remove to cooling rack. They have to cool all the way before you put them in a bag or container to store or the icing gets over everything Smile
 
blog andes mint cookies 1
 
Kira has an adorable cookie recipe print out on this but it’s missing the eggs so be sure and write that in!!!

Till Next Time!  ~CreativeJuicesDecor~

Spontaneous SNOW Post

I usually plan every post and schedule it, but this one is “as is” right now!!!

Winter has officially begun and the snow is HERE! They have been out there all morning  (with occasional visits inside for hot chocolate.)

Over on this side of the mountain, our winter begins!!!
1 kids snow copy
1 kaelah sledding3
1 kaelah sledding 1
1 kaelah sledding 2
1 kaelah sledding


1 ryland snow

background fixed aria snow
aria w action

ENJOY THE SEASON!  ~Selina

House Construction Update–Electrical,Plumbing and Siding

Hellllooooo…….

It’s been a while without a construction update so I’ll just give you the run down on the latest……..

We now have a “shop”.  I  like to call it our barn just because it sounds more fun, but really, it is just a glorified garage. 

iron 006

That part went up FAST!  They are now working on the road back to the shop.  (I never knew how much went into doing a road correctly! I mean isn’t it just dirt???  Guess not, it's SPECIAL dirt!)

siding 012

On the house they started electrical, plumbing and heating/air conditioning.  It is CRAZY all that goes under that nice pretty white drywall!  I can’t imagine having all the knowledge to build an entire house on your own……everything is so complicated and each person has their specialty. 

siding 010
siding 011


All that stuff isn’t very pretty though so that’s why I haven’t posted much on the house!

The unpainted hardy plank siding is coming right along…..I would think in a week the entire house will be sided!
(East side of the house – the garage)
siding 013

I have been debating what paint color to use. I’m going neutral so I don’t think I can go “wrong”…… (well, at least I’m telling myself that - HA!) I have to choose the body of the house, the board and batten and the fascia/trim….. that dark brown would be the trim…..(for those wondering if I was considering painting my entire house blackish brown)  Smile

iron 011

I have had my AHHHHHH moments where I really did do something wrong…..I’ll be sure and write a post on that soon enough…..maybe it will have to be a Fess Up Friday post……it was pretty bad.  Open-mouthed smile

Sneak Peak….. does that look like Techno glass or what?  Believe me when I tell you it looked awful on my “Tuscan” front entry……it all worked out in the end but I did have a sudden panic rush when I saw it installed!

front door 012

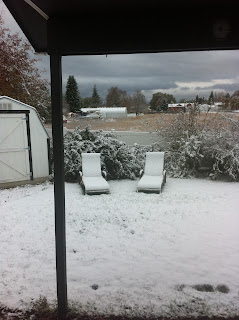
OK well that’s it!  I forgot to take pictures of the back patio…..that'll have to be on the next house installment.  We did PAVERS (they look like bricks) and I am SO excited about them!!!!  I may have missed my opportunity to take outdoor pictures as this week it SNOWED!!!  (I'm actually not super excited about that.....my kids are though and that seems to be all that matters sometimes!)

I still have my lawn chairs out just hoping for one more nice sunny day!  (Either that or I was just lazy and didn't put them away yet.....that couldn't be the reason) Winking smile


Till Next Time!
~Creative Juices Decor~

Final Touches on My Brother’s Home - Kitchen


I couldn’t show you guys earlier what I did on my brother’s kitchen earlier because I didn’t finish it on my trip.  I had to come home and make him a few things to bring back on my next trip.  If you haven’t seen his other before and after pictures head on over there.  Lots of fun - it was all done thrift store shopping for $150 bucks!

Here is the kitchen BEFORE:

nano 006

The kitchen while being worked on (we painted and put up that flower picture that I got for 10 bucks.)

nano 024

I refused to put back those UGLY chairs!  I told him to look on Craigslist for 4 cheap chairs. 
And here are the letters I made for the other wall.

1.) Bought letters from Michaels (2.50 each)

2.) Picked some scrapbook paper to match the décor.
3.) Cut it out
4.) Made a glue and water mixture (1 part water to 4 parts glue)
5.) Applied glue on letters, put on cut paper, applied glue on top, let dry, “chalk” the edges with a scrapbook chalker.
ccc cookies EAT 001
ccc cookies EAT 002
ccc cookies EAT 003


EAT
ccc cookies EAT 015

And here is the after picture, nothing spectacular but still fun!

Eat Kitchen 1

The dining room is next…..some day I’ll get to fix that up too! 


My brother wrote me this regarding the kitchen:

“Hey Selina,
I have to admit it seemed a little goofy that people would put a word like eat on their wall.  But, I if it's high fashion these days, I'm sure it will grow on me.  I'll be curious to see what the kids say tomorrow.  Thanks for catapulting me into architectural digest for the 21st century!”
 
He’s so great….it made me laugh…..

For other that like Food related wording decor Diddle Dumpling did a fantiastic easy tutorial how to transfer PRINTER paper to a piece of wood for decor.  Go check her out!


ALSO check out my post on all different types of letter decor!


simply daisy

Till Next Time!
~ CreativeJuicesDecor~

Related Posts Plugin for WordPress, Blogger...