Now this was a fun project! I'm happy to be able to show all of you a step by step tutorial on how to apply American Clay.
It wasn't my typical clay wall because one of it's purposes was to be used as a photography backdrop instead of having to put up canvases in this professional photographers family room. I had to view this project as more of an art piece than "just doing a wall" Thank goodness I have a fine arts background or I would have been terrified!
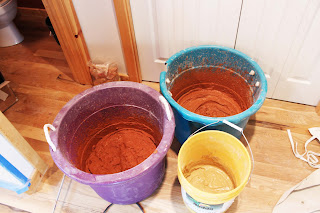
Getting the clay ready is a lot like baking :-) You just dump in some water (generally a gallon is fine to start out) pour in the clay, stir it around (with a power drill and paddle) , sprinkle in the pigment, stir it around and add more water, sprinkle in the binder (up&ez) stir it around and just get it to the consistency of a McDonald's milkshake. (Just like baking - right?) You should let the clay sit for at least 30 minutes but it can sit for a few days if you needed it too.
This project consisted of 3 colors - Bryce Canyon, Palomino Valley, and Acacia. This was the first time I used American Clay's newer product Enjarre and Up and EZ binder. Enjarre is their only one coat system and for those on a tighter budget it makes doing clay on the walls a doable option.
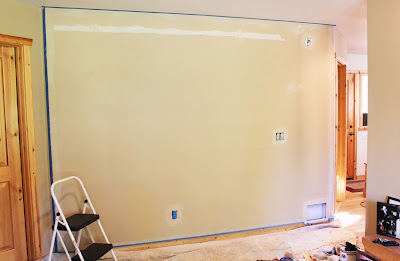
Here are the before shots!
Get ready to see the transformation from country STENCILS to Tuscan BEAUTY!!!
My advice for any one attempting this at home is to just GO FOR IT. If you think too much about it you will never start. (Or just hire me and you won't have to worry about a thing!) I troweled on a rotation of Bryce Canyon and Palomino Valley to give added depth and texture to the wall.
I'm sorry, isn't this clay is the most mouth watering, luxurious thing you have ever seen? Makes me want to eat it! (which by the way you CAN, this stuff is so natural.)
 |
| Enjarre one coat mixed pigments of Bryce Canyon, Palomino Valley, and Acacia. |
After I covered the walls in the 2 darker tones (which was tricky since the clay color wet isn't the clay color dry, so it is kind of like you are painting blind!) I skip troweled on the Acacia color in spontaneous areas. Once the lighter color dried for a while I used a clean plastic trowel to blend it into the darker colors.
Here is the wall finished with the first coat and still wet. (Remember the clay always dries a LOT lighter.)
Here are the AFTER shots! It is so textured and rich! Can you also see this is a powder room, or a wall in your kitchen? Shoot me an email and I'd be happy to do it!
 |
| Previously they had to hang canvas as a backdrop on their plain wall. (isn't it loverly.) (-: |
 |
| Time for a fresh new look! Click this link to be directed to their website - they are absolutely amazing! |
Thanks for looking! Contact me for any information regarding the clay or other design questions.
Don't miss out on Selina's home decor tips and inspirations - Sign up to receive her once a week post :-)


Wow - that color is breathtaking! Coral
ReplyDeleteThat turned out amazing, they will love using it for photos and to simply enjoy every day!
ReplyDeleteThat turned out beautiful! Good before shots too ;) Definitely a huge improvement. See, the beauty of this blog is that now people can see the final product before they jump in and do it on their own wall... that is always the scariest part. Not knowing what it will look like.
ReplyDeleteGood post!
Thanks Selina - we love it!
ReplyDeleteWOWzer! If my house were not on the market I would be on the hunt for some American Clay! This looks like a wonderful product. You have mad skills! The walls are amazing!
ReplyDelete